
Adding Your Custom Email Signature to Gmail
STEP 01: Navigate to the secret Design Assets page created for you on the backend of your website. In a separate tab, open and log into your business Gmail and open a new email. We will build your email signature in an email and then copy and paste into your email settings.
STEP 02: Open the Google Doc here and follow the prompt to select, copy and paste the invisible table into the body of the email.
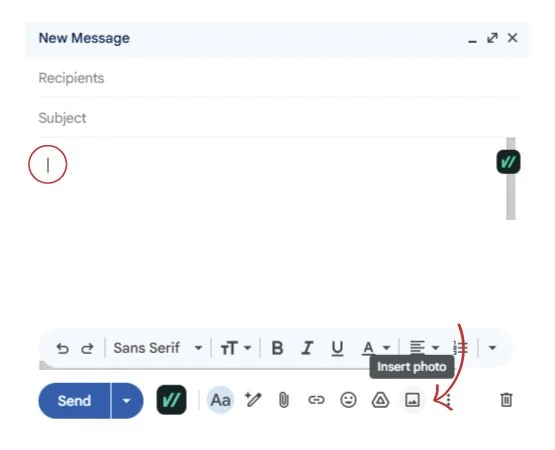
STEP 03: While your cursor is within the far left side of the invisible table, click “Insert Photo” and the image box will open. We will be using the Web Address (URL) option.
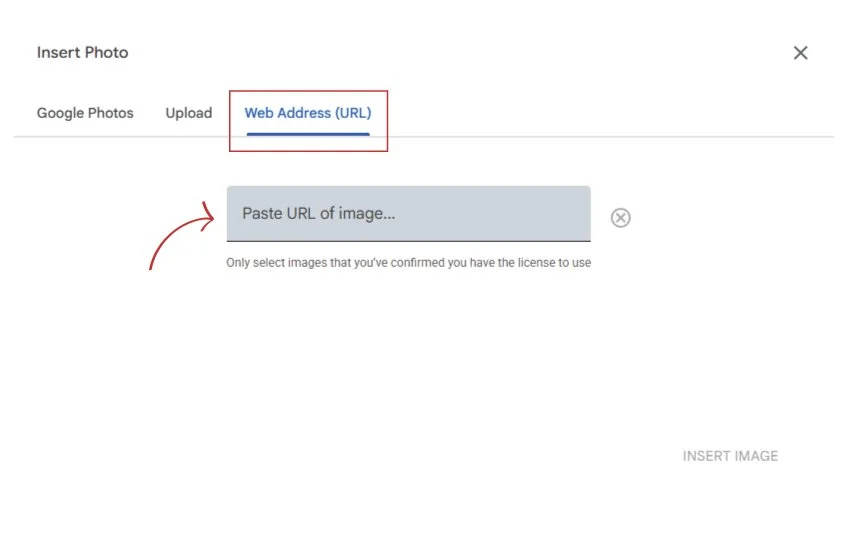
STEP 04: Navigate back to the Design Assets page on your website. Right click the far left section of your new email signature and select “Copy Image Address”. Paste this URL in the “Insert Photo” box in the “URL of image” field and select “Insert Image”. The image will populate and you can drag the corners to resize the image.
STEP 05: Move your cursor over to the right side of the invisible table and repeat this process with the other sections of your new email signature.
STEP 06: Once everything is in place, highlight and copy all of the elements of your new email signature within the email. Navigate to the Gear Icon in the top right of Gmail and Click Settings > See All Settings.
STEP 07: On the General Tab, scroll down to the signature section toward the bottom. Click “Create New” and add a name for your new email signature. Paste the elements of your new email signature inside the signature box and select each piece to “add a link” making each element clickable.
STEP 08: Under the email signature box update the “Signature Defaults” settings to show your new email signature on new emails and replay/forward emails. Scroll down to the bottom and click “save changes” to make your email signature active within your emails.